
Quick fit rule
Start with the band, then check the cups, then adjust the straps. The band should provide most of the support, the cups should contain tissue without empty space or overflow, and the straps should fine-tune placement without digging.
Problem 1
Band riding up

A supportive bra band should sit level around the body. If the back band climbs upward, the front of the bra often tips down and the straps start doing work the band should be doing.
What to try
- Try a smaller band with a sister-size cup adjustment if the cups currently feel close.
- Make sure the band is fastened on the loosest comfortable hook when the bra is new.
- Re-check your underbust measurement if several bras ride up the same way.
Problem 2
Band too tight
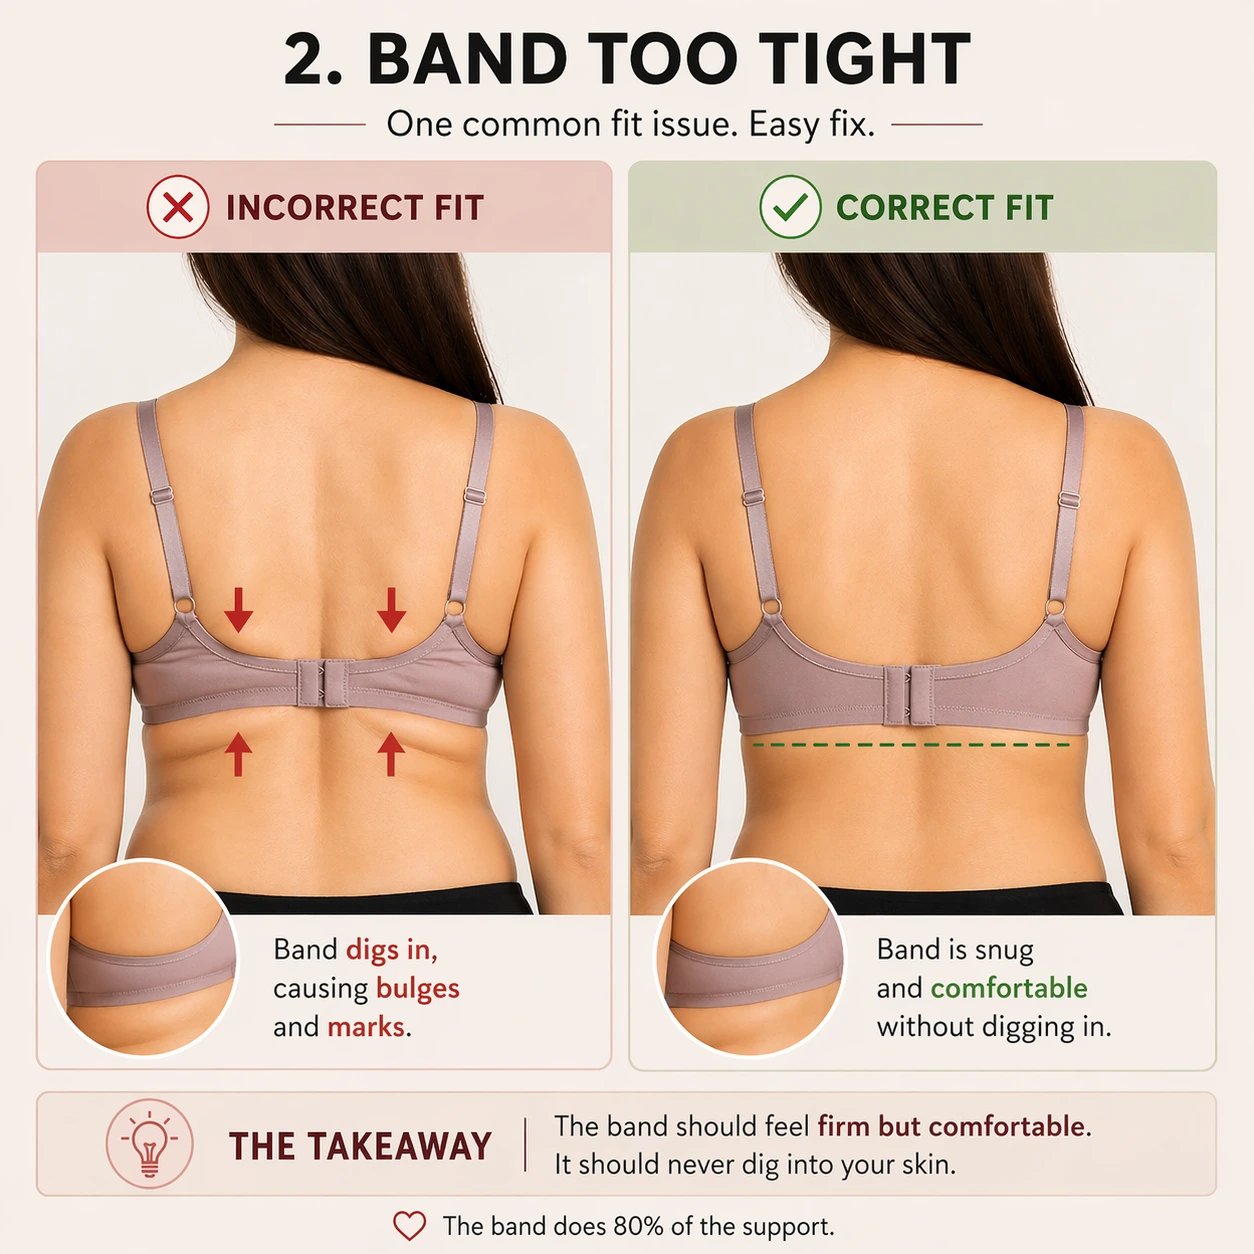
The band should feel firm enough to anchor the bra without pinching, rolling, or making normal breathing uncomfortable. Some indentation is normal after wear; pain or sharp pressure is not a useful fit signal.
What to try
- Try the next band size up and move down one cup letter to keep similar cup volume.
- Check whether the tightness is coming from the band itself or from cups that are too small pulling the band forward.
- Use an extender temporarily only if the cups, wires, and overall support otherwise feel right.
Problem 3
Cup spillage
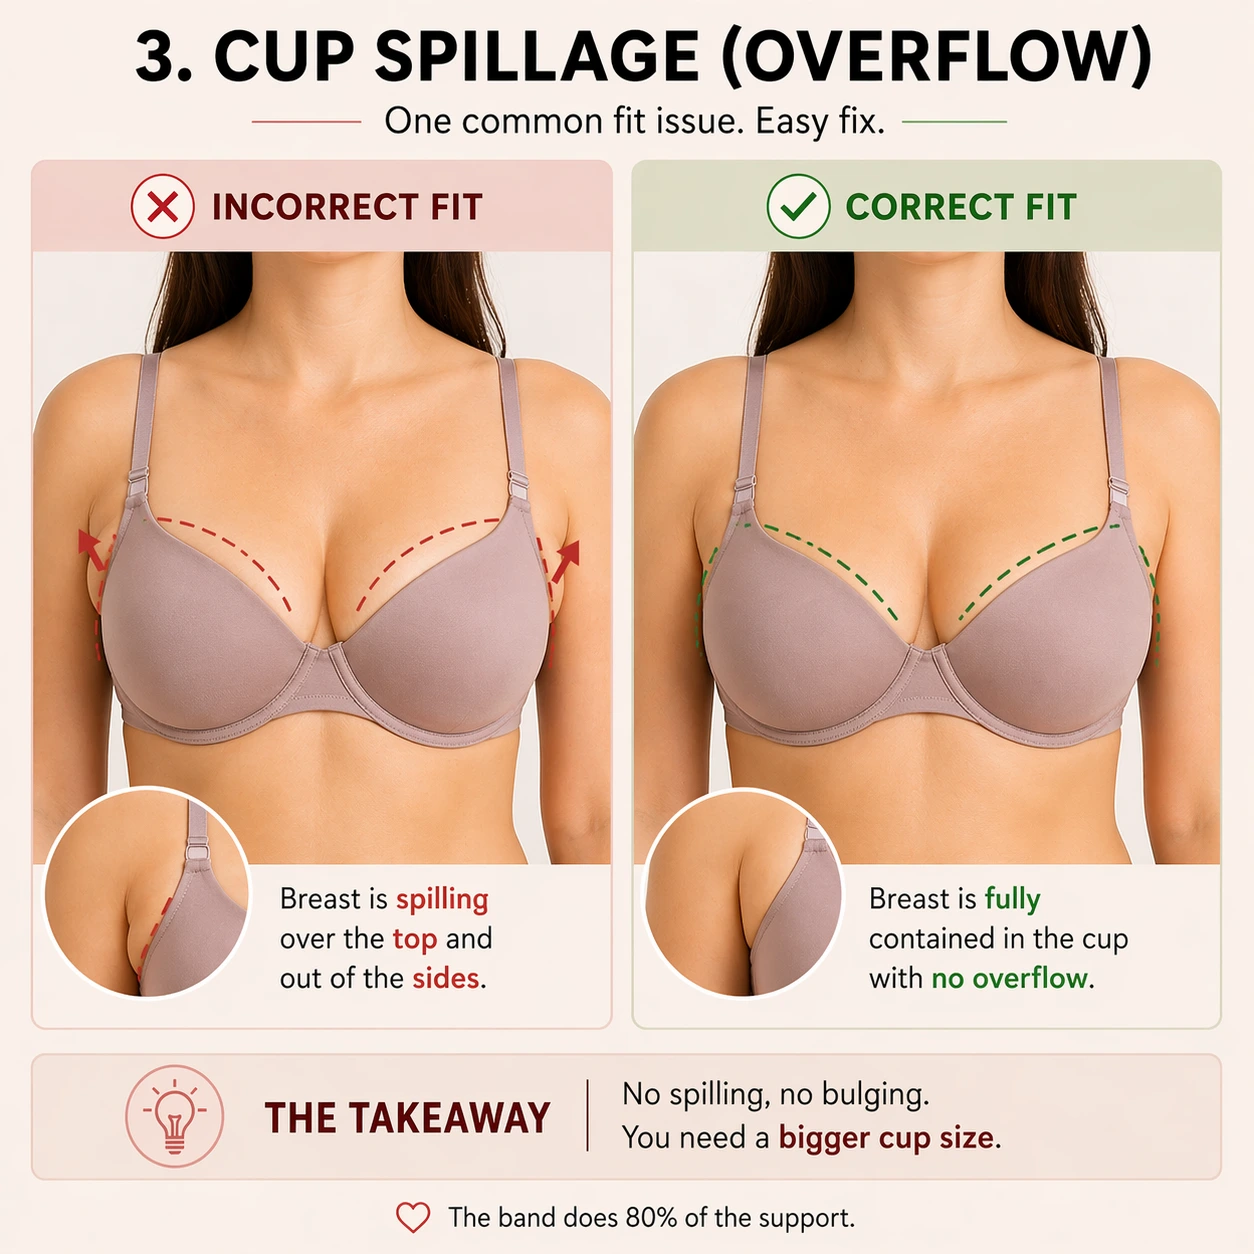
Spillage can show at the top edge, toward the center, or near the underarm. It often means the cup is not giving breast tissue enough depth, coverage, or containment.
What to try
- Try a larger cup in the same band if the band feels stable.
- Look for deeper cups or a different style if the size increase creates empty space elsewhere.
- Scoop and settle tissue into the cups before judging the fit.
Problem 4
Cup gaping
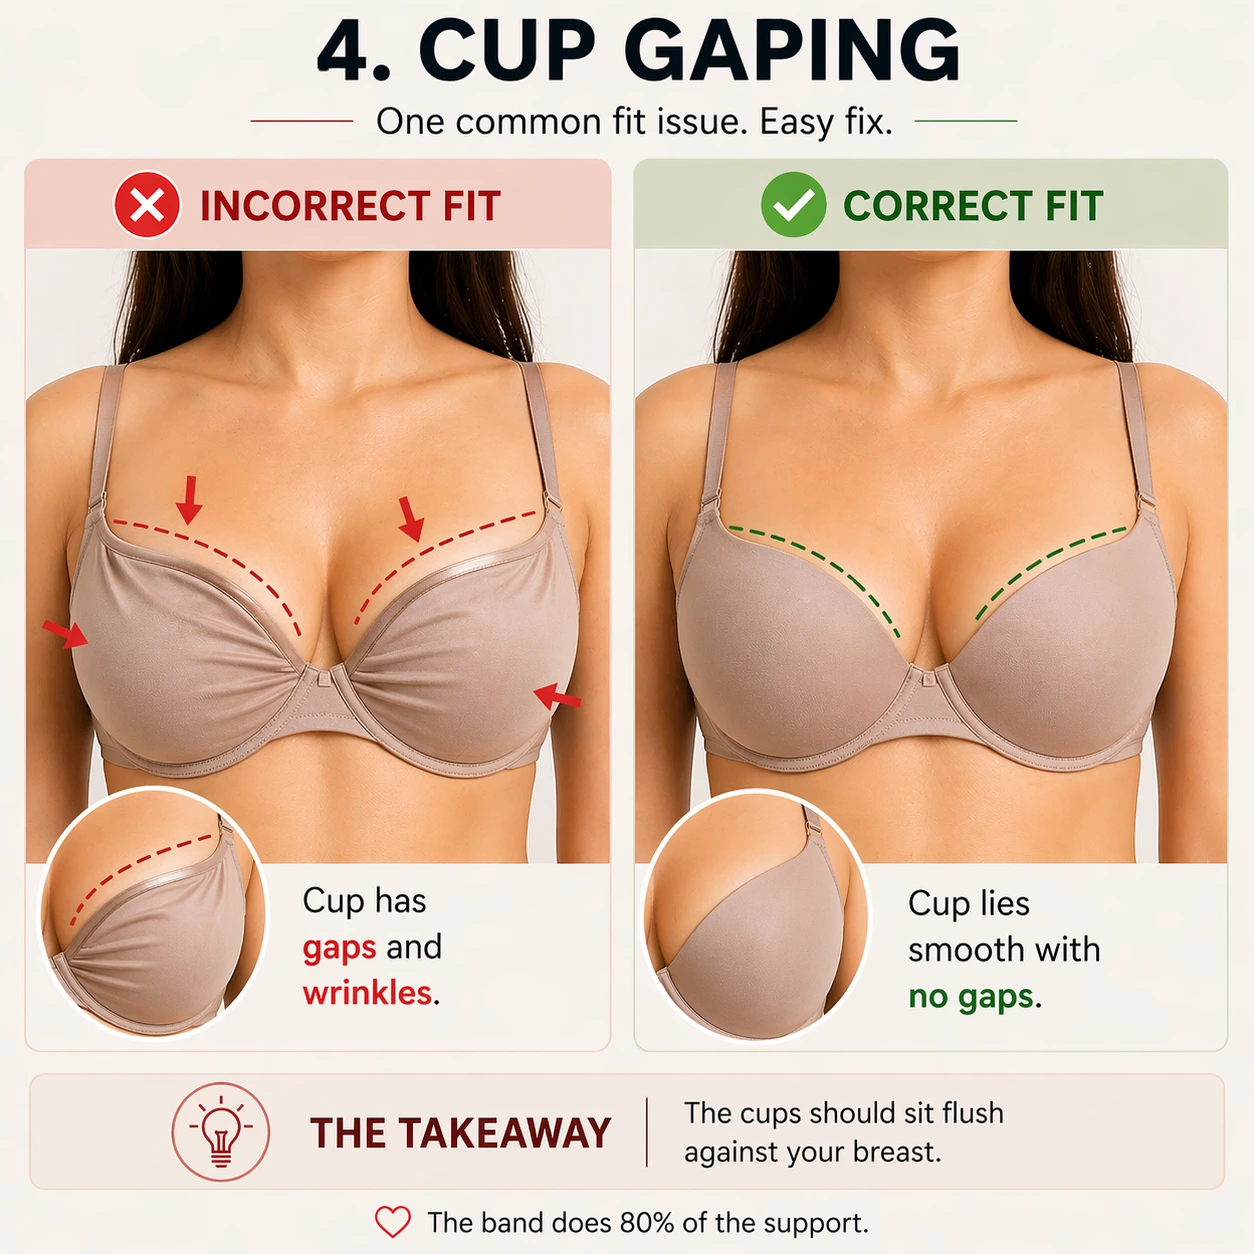
A gap at the cup edge does not always mean you need a smaller cup. Molded cups, tall cups, and styles built for more upper fullness can gape even when the cup volume is close.
What to try
- Tighten straps only enough to remove slack; do not use them to force the cup flat.
- Try a shorter cup, stretch lace cup, plunge, or balconette shape if the volume feels close.
- If the whole cup is empty, try one cup size down.
Problem 5
Straps slipping off
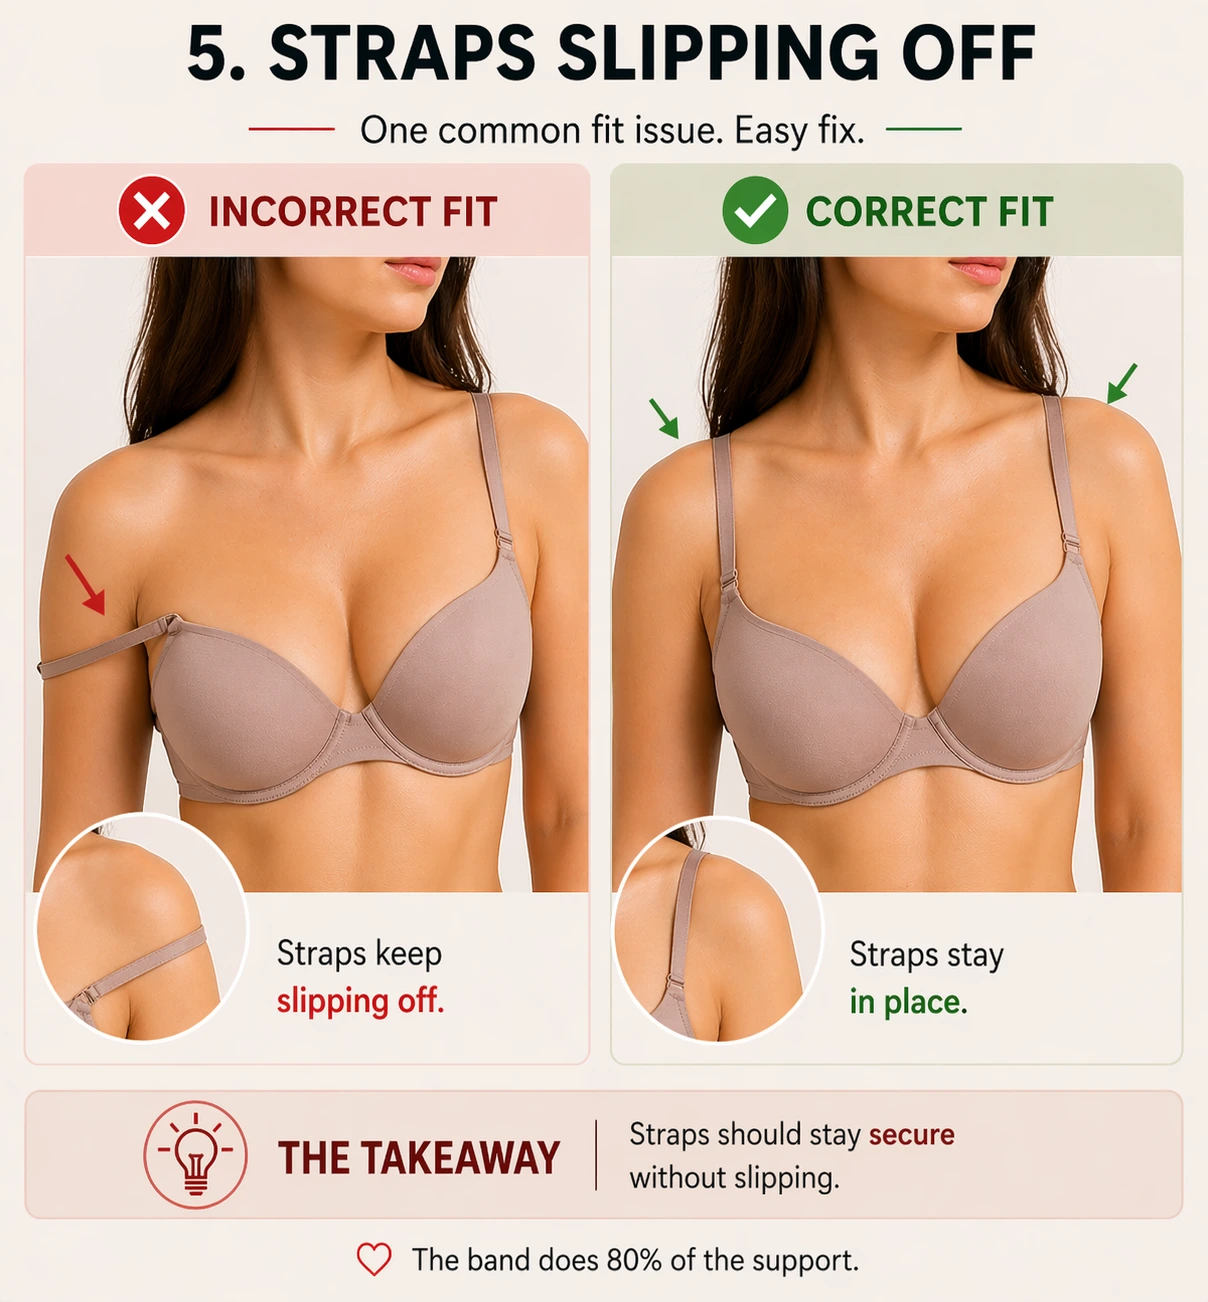
Straps should stabilize the cup edge, not hold the whole bra up. If they keep sliding off, the band may be riding up, the straps may be too wide-set, or the bra style may not match your shoulders.
What to try
- Confirm the band is level before adjusting strap length.
- Try a racerback clip, closer-set straps, or a balconette/plunge style with a better strap angle.
- Replace bras with stretched-out straps that no longer hold adjustment.
Problem 6
Straps digging in
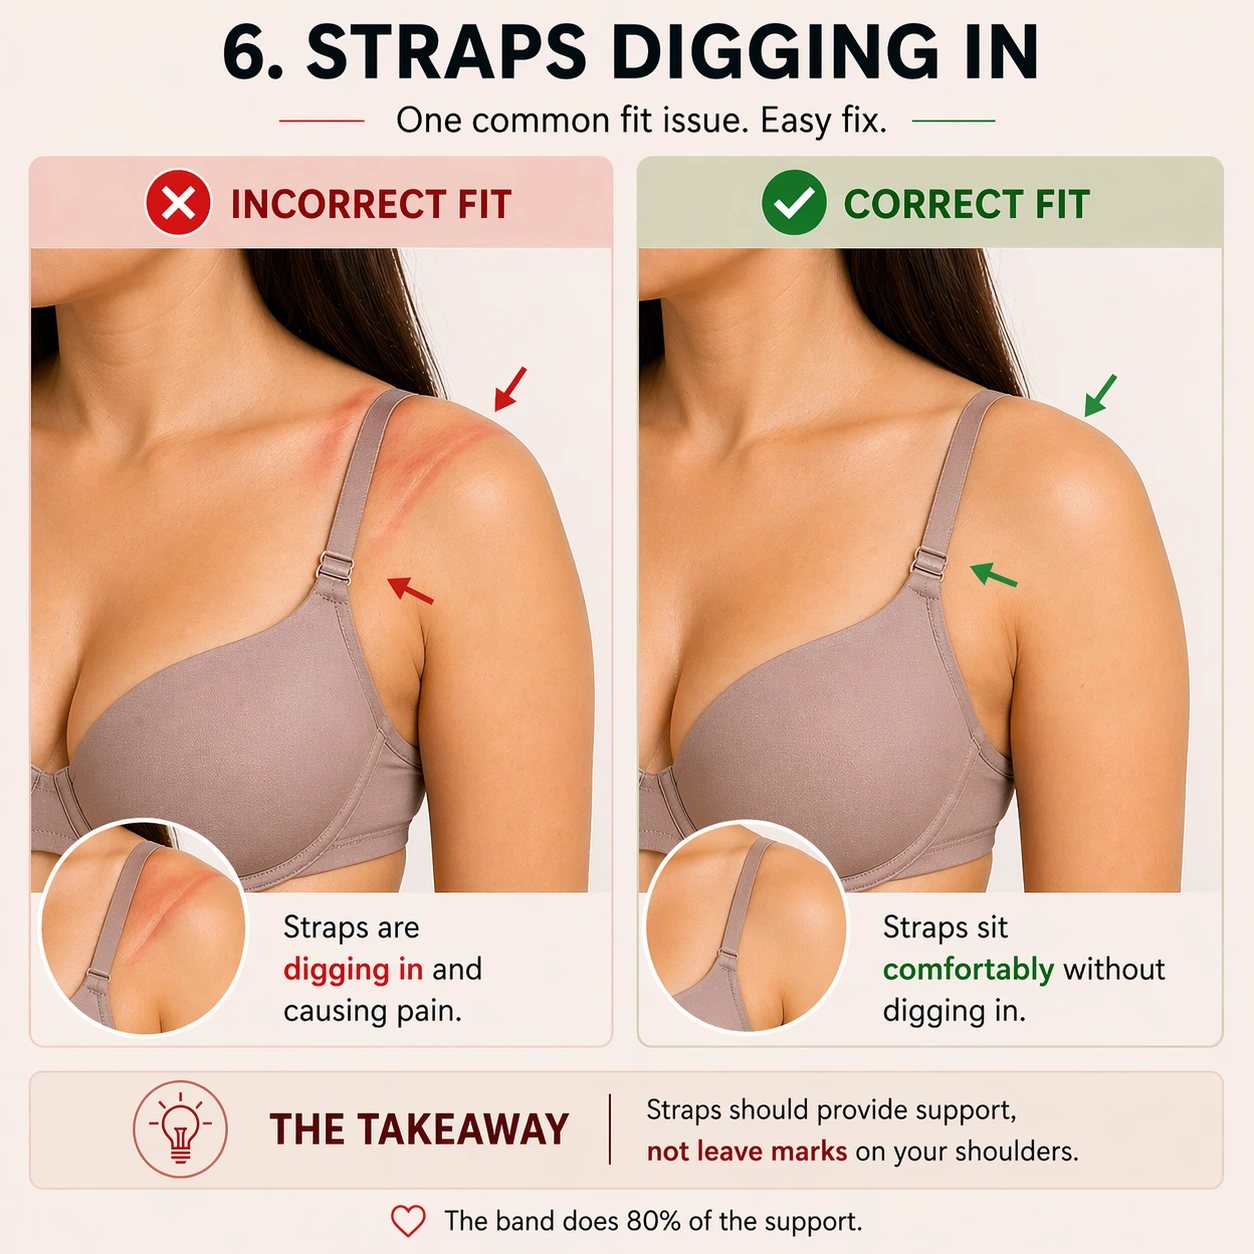
When the band is too loose or the cups are not supporting the breast tissue well, people often tighten straps to create lift. That can cause shoulder pressure without actually fixing the fit.
What to try
- Loosen the straps, then check whether the band still supports the bra.
- Try a firmer band or a cup shape with better lift if the bra drops when straps are loosened.
- Look for wider or cushioned straps only after the band and cup fit are working.
When one fix creates another problem
Bra sizes work as a system. A smaller band changes cup volume unless you sister-size, and a larger cup may still gape if the cup shape is wrong. If two or more issues show up together, re-measure first, then compare your result with one nearby sister size.
For a measurement-based starting point, use the bra size calculator. For nearby sizes, try the sister size calculator.


